
Welcome to the exciting world of 3D modeling! If you’ve ever wanted to bring your creative ideas to life in a three-dimensional space, Blender is an excellent tool to get started. This beginner’s guide will walk you through the basics of creating your first 3D model in Blender.
In this post:
What is blender?
Blender is a powerful, open-source 3D computer graphics software used for creating animated films, visual effects, art, 3D games, and more. It is a comprehensive and versatile tool that supports various aspects of the 3D content creation pipeline.
Why use blender?
Blender’s versatility and free availability make it a popular choice for artists, animators, game developers, and filmmakers seeking a comprehensive and cost-effective 3D creation tool.
But there are more key features and aspects of Blender that are very welcoming when you want to create 3D models for your online shop:
- Modeling: Blender allows users to create 3D models using a range of modeling techniques. This includes polygonal modeling, sculpting, and procedural modeling
- Texturing and Shading: Blender provides tools for applying textures and materials to 3D models. Artists can create realistic surfaces by adjusting parameters like color, reflectivity, and bump mapping.
- Rendering: The rendering engine in Blender helps turn 3D scenes into 2D images or animations. Blender’s built-in rendering engine, Cycles, offers realistic rendering with features like ray tracing and global illumination.
Whether you’re a beginner or an experienced professional, Blender provides a robust platform for bringing creative ideas to life in the digital realm.
Creating 3D models in Blender
Step 1: Download and install Blender
Begin your 3D modeling journey by downloading and installing Blender from the official website (https://www.blender.org/download/). Blender is a powerful, free, and open-source software that supports various operating systems.
Step 2: Familiarize yourself with the interface
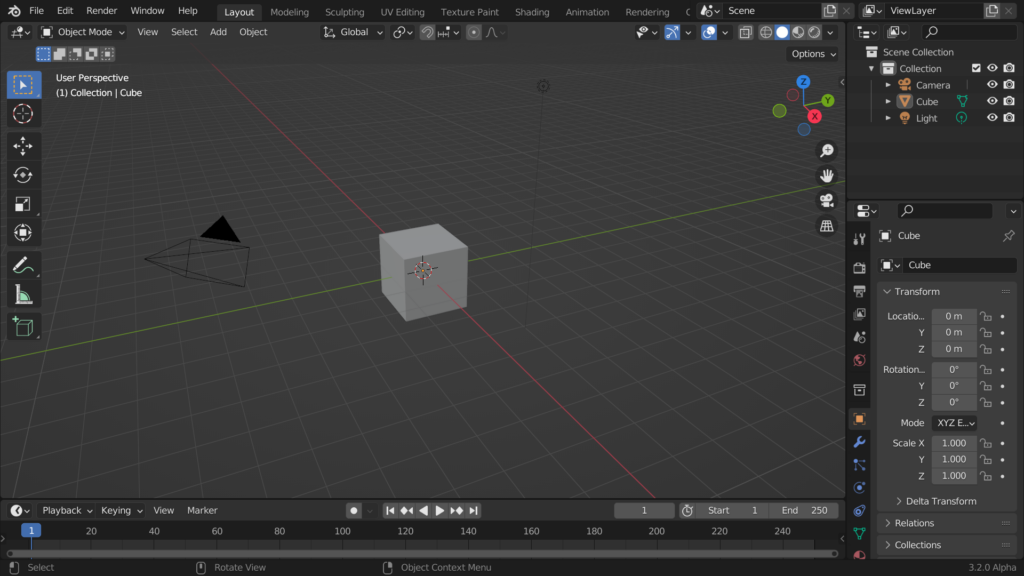
Upon opening Blender, you’ll be greeted by a complex interface. Take a moment to understand the primary components:
- 3D Viewport: This is where your 3D scene is displayed.
- Outliner: Displays a hierarchical view of all objects in your scene.
- Properties Panel: Adjust object and scene settings here.
Step 3: Navigate in 3D space
Navigate the 3D space by using the following controls:
- Rotate: Middle mouse button.
- Zoom: Scroll wheel.
- Pan: Hold down the middle mouse button while holding Shift.
Step 4: Add a basic object
Start your modeling journey by adding a basic object to the scene:
- Press
Shift + Aor go to the “Add” menu in the 3D Viewport. - Choose “Mesh” and then select a primitive shape (e.g., cube, sphere, or cylinder).
Step 5: Object mode and edit mode
Blender has two primary modes: Object Mode and Edit Mode.
- Object Mode: Allows you to select, move, and scale entire objects.
- Edit Mode: Press
Tabto enter Edit Mode, where you can manipulate individual vertices, edges, and faces.
Step 6: Basic editing tools
Understand essential editing tools in Edit Mode:
- Vertex, Edge, and Face Select: Switch between these modes to select specific parts of your object.
- Extrude: Press
Eto extrude selected geometry, creating new elements. - Scale and Rotate: Use
Sto scale andRto rotate selected components.
Step 7: Materials and textures
Enhance your 3D model by adding materials and textures:
- In the Properties Panel, go to the Material tab.
- Click “New” to create a material.
- Adjust material properties and consider adding textures for realism.
Step 8: Lighting and rendering
Master the art of lighting for better 3D renders:
- Add lights by pressing
Shift + Aand selecting “Light.” - Experiment with different light types (e.g., Point, Spot, Sun).
- Switch to “Rendered” view in the 3D Viewport to preview your scene’s final appearance.
Step 9: Save your work
Remember to save your progress:
- Click “File” in the top-left corner.
- Choose “Save” or “Save As” to save your Blender project file (.blend).
Congratulations! You’ve successfully created your first 3D model in Blender.
Resources
If want to continue exploring new technique, and enjoying the endless possibilities that 3D modeling with Blender offers, you should really dive deeper into Blender’s vast capabilities.
A few resources to help you explore the possibilities:
- Explore online tutorials
- Read the Blender manual.
Happy blending!

